Spring Boot集成Solr全文搜索
原创文章,转载请注明出处
最近有个项目想针对现有的Mysql数据库做全文检索.Mysql本身的全文检索相对较弱,所以想寻找个替代的方案。最先考虑的肯定是Lucene,先实现起来相对复杂,自然而然的找到了构建在Lucene之上的Solr和Elasticsearch。Elasticsearch无疑是目前最为流行的数据检索的框架,但我这个项目对实时性并没有要求,且Solr方案相对简单一些。所以最终采用了Solr作为检索服务器.项目后端采用的是Spring boot,所以最终就涉及了如何在Spring boot中集成Solr的问题。
在Spring Boot项目中引入Solr
如果你使用Spring Initializr创建Spring Boot项目,那么在过程中就可以引入Solr
在已有项目中引入Solr,则在pom文件中加入依赖1
2
3
4<dependency>
<groupId>org.springframework.boot</groupId>
<artifactId>spring-boot-starter-data-solr</artifactId>
</dependency>
配置Solr数据源
假定你已经有一个部署好的Solr服务器,在application.properies文件中配置
application.properies1
2spring.data.solr.host=http://127.0.0.1:8393/solr/
spring.data.solr.repositories.enabled=true
使用spring data jpa访问solr
假如你的solr服务器中已经配置了一个叫做student的core,那么我们首先需要编写一个与之对应的实体
创建Student实体
Student类1
2
3
4
5
6
7
8
9
10
11
12
13
14
15
16
17
18
19
20
21
22
23
24
25
26
27
28
29
30
31
32
33package com.felix.springbootpractice.domain.entity;
import org.apache.solr.client.solrj.beans.Field;
import org.springframework.data.solr.core.mapping.SolrDocument;
import java.lang.annotation.Documented;
(solrCoreName="student")
public class Student {
("id")
Long id;
("name")
String name;
("age")
Integer age;
public Long getId() {
return id;
}
public void setId(Long id) {
this.id = id;
}
public String getName() {
return name;
}
public void setName(String name) {
this.name = name;
}
public Integer getAge() {
return age;
}
public void setAge(Integer age) {
this.age = age;
}
}
- @SolrDocument(solrCoreName=”student”),solrCoreName就是core的名称
- @Field(“id”),用于指定对应core中的字段名称
创建Repository
StudentRepository类1
2
3
4
5
6
7
8
9
10
11
12
13
public interface StudentRepository extends SolrCrudRepository<Student,Long> {
List<Student> findByName(String name);
("*:*")
Page<Student> findAllWithPageable(Pageable pageable);
(prefix = "</highlight>",postfix = "</highlight>")
("*:*")
HighlightPage<Student> findWithHighlight();
}
我们在StudentRepository创建了三个查询方法
- findByName,根据方法命名实现默认的查询
- findAllWithPageable,根据@Query中的Lucene查询语法进行查询,并进行了分页操作
- findWithHighlight,根据@Query查询且返回高亮数据
创建Service方法
StudentService类1
2
3
4
5
6
7
8
9
10
11
12
13
14
15
16
17
18
19
20
21
22
23
24
25
26
27
28
29
30
31
32
33
34
35
36
public class StudentService {
private StudentRepository studentRepository;
public List<Student> searchByName(String name){
return studentRepository.findByName(name);
}
public List<Student> searchWithPageable(Integer pageNum,Integer pageSize){
PageRequest pageRequest = PageRequest.of(pageNum,pageSize);
return studentRepository.findAllWithPageable(pageRequest).getContent();
}
public List<Student> searchWithHighlight(Integer pageNum,Integer pageSize){
List<Student> result = new ArrayList<>();
PageRequest pageRequest = PageRequest.of(pageNum,pageSize);
HighlightPage<Student> highlightPage = studentRepository.findWithHighlight(pageRequest);
// highlightPage.getContent(); 这个是返回不带高亮数据
/*
这里处理逻辑是遍历Highlighted数据,然后把指定的字段的高亮数据替换到Entry的数据中,然后再放到返回结果列表中
*/
for(HighlightEntry<Student> highlightEntry : highlightPage.getHighlighted()){
for(HighlightEntry.Highlight highlight : highlightEntry.getHighlights() ){
if(highlight.getField().equals("name")){
highlightEntry.getEntity().setName("");
String temp = "";
for (String sl : highlight.getSnipplets()){
temp+=sl;
}
highlightEntry.getEntity().setName(temp);
}
}
result.add(highlightEntry.getEntity());
}
return result;
}
}
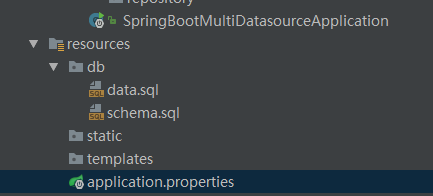
项目目录结构
至此,Spring Boot集成Solr差不多就完成了,最后Contrller调用Service就可以了.
项目代码地址: https://github.com/felix1982/spring-boot-practice/tree/master/spring-boot-solr